When a pothos starts drying out in 2 days instead of 7, or a peace lily droops even after watering, the pot may be the problem. I’ve seen plenty of houseplants perk up within 2 to 4 weeks after repotting, especially when roots were circling the inside of the container like a tight spring.
The good news is that repotting houseplants step by step is not complicated once you know the sequence. A few careful choices, like moving up just 1 to 2 inches in pot width and keeping the room around 65-75°F (18-24°C), can make the whole process much easier on the plant.
1. Check Whether the Plant Actually Needs Repotting
Before you buy a new pot, look for the signs that the current one is too small. Roots coming out of the drainage holes, soil pulling away from the sides, and water running straight through in under 10 seconds are all classic clues. I also pay attention to how often the plant dries out; if a Monstera deliciosa needs water every 3 days, while it used to hold moisture for 8 to 10 days, that usually means the roots have filled the container.
One practical test is to slide the plant out and inspect the root ball. Healthy roots are usually white or tan and firm, while stressed roots can look mushy or dark. If you see roots circling the pot in a dense ring, the plant is likely rootbound. That said, not every plant wants a bigger pot right away; a snake plant, Sansevieria trifasciata, often tolerates being snug for longer than a fast-growing philodendron.
I also like to check the season and room conditions. Repotting is easier when indoor humidity sits around 40-60% and the plant is not fighting cold drafts from a north-facing window. If your home drops below 60°F (16°C) at night, wait for steadier conditions if you can.
2. Pick the Right Pot and Soil Mix
The best repotting houseplants step by step plan starts with the pot itself. Choose a container with drainage holes and go only 1 to 2 inches wider than the old one for most plants. Jumping from a 6-inch pot to a 10-inch pot can leave too much wet soil around the roots, which increases the risk of rot.
For most tropical houseplants, I like a mix that drains fast but still holds some moisture: 2 parts indoor potting mix, 1 part perlite, and 1 part orchid bark. If you grow a finicky plant like Monstera ‘Thai Constellation’, that airy blend helps prevent soggy roots. For succulents, I’d go even grittier, with at least 50% mineral material.
Soil pH matters too. Many common houseplants do well around pH 6.0-6.5. If you use a moisture meter or pH kit, that tiny bit of data can save you from guessing. A decent nursery pot may cost $3-$8, while a heavier ceramic planter can run $18-$40, so it helps to know what you need before you shop.
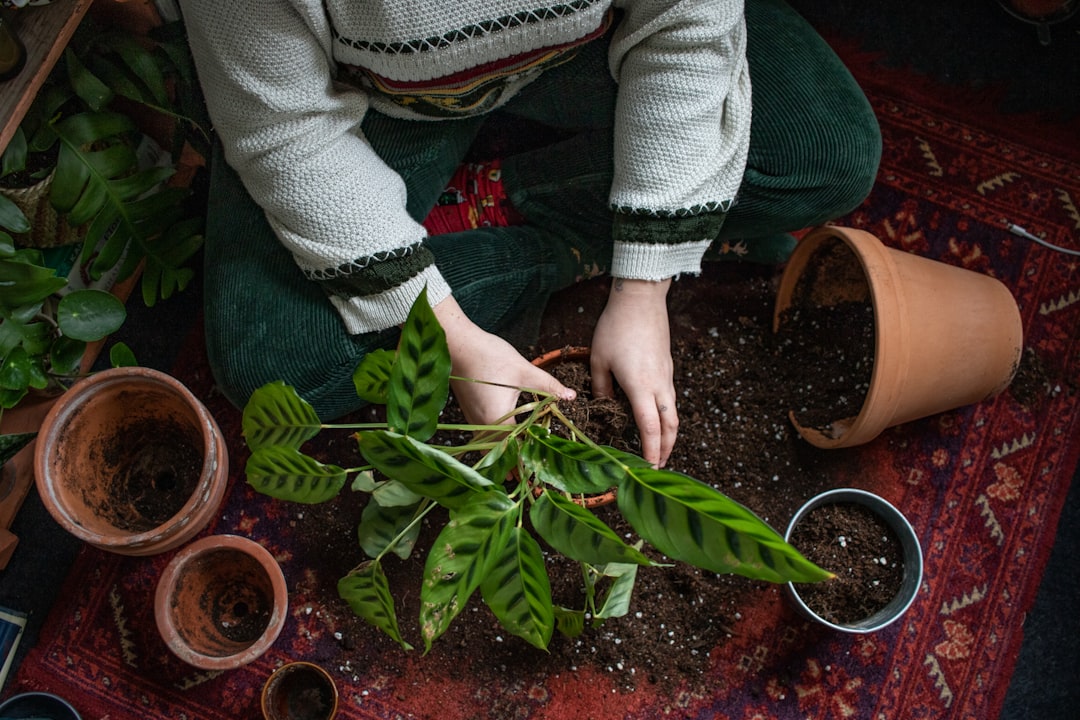
3. Water and Remove the Plant Without Damaging Roots
About 1 to 2 hours before repotting, water the plant lightly so the root ball is easier to remove. You want the soil slightly damp, not dripping. If the mix is bone dry, it can crumble apart; if it’s soaked, it becomes heavy and messy. I’ve found that a plant watered the day before usually slides out with far less stress than one watered right before the job.
Turn the pot on its side and gently squeeze the sides if it is flexible. For a rigid pot, tap the bottom and edges, then ease the plant out by holding the base of the stems, not the leaves. If roots are stuck, I use a clean knife to loosen the edge rather than yanking. A few broken feeder roots are normal, but tearing the main root mass can set the plant back for 2 to 3 weeks.
Once it is out, shake away only the loose old soil. You do not need to strip every bit off the roots. Leaving some soil attached helps reduce shock, especially for plants like ZZ plant, Zamioculcas zamiifolia, which dislike rough handling.
4. Trim, Tease, and Set the Roots in the New Pot
Now comes the part where repotting houseplants step by step really pays off. Gently tease apart circling roots with your fingers, especially around the bottom and outer edges of the root ball. If you find dead, black, or mushy roots, trim them with sterilized scissors. A quick wipe with 70% isopropyl alcohol before and after cutting is enough for most home jobs.
Set a small layer of fresh mix in the bottom of the new pot, then place the plant so the top of the root ball sits about 1/2 inch below the rim. That little gap keeps water from spilling over when you irrigate. Hold the plant upright while you fill in around the sides, tapping the pot gently to settle the mix. Do not pack it down hard; roots need air as much as moisture.
If the plant had a leaning stem, rotate it so the best side faces the room or your east window. I’ve noticed that a freshly repotted rubber plant, Ficus elastica, settles in faster when the stem is centered and supported from the start. For tall plants, a stake can help for the first 10 to 14 days.
5. Water Correctly and Give It a Recovery Window
After repotting, water slowly until you see runoff from the drainage holes. For a 6-inch pot, that may take about 250-400 ml; for an 8-inch pot, it may take 500-700 ml depending on the mix. Let excess water drain completely, and never leave the pot sitting in a saucer full of water for more than 30 minutes.
Then give the plant a recovery spot with stable conditions. Most houseplants do best at 65-75°F (18-24°C), away from heating vents and direct afternoon sun. If the plant normally lives near a 2000-5000 lux window, keep it in that range but avoid the harshest rays for the first 5 to 7 days. A little less light for a short period is safer than pushing a stressed root system too hard.
I usually skip fertilizer for 4 to 6 weeks after repotting. Fresh soil already has enough nutrition for the short term, and feeding too soon can burn tender roots. During that recovery window, check the soil with your finger every 7-10 days instead of on a fixed schedule. The goal is steady moisture, not constant wetness.
6. Watch for Recovery Signs and Know When to Intervene
Repotting houseplants step by step does not end when the plant is back on the shelf. The next 2 to 4 weeks tell you whether the move worked. Good signs include new leaf movement, firmer stems, and soil that dries at a more even pace. A spider plant, Chlorophytum comosum, often starts sending out fresh growth once it has room to breathe again.
Some drooping in the first 24 to 48 hours is normal, especially for thirstier plants like calathea or peace lily. What you do not want is yellowing leaves, a sour smell from the pot, or soil that stays wet for 10 days or more. Those are clues that the mix is too dense or the pot is too large. If that happens, I reduce watering and check drainage before making any other changes.
One thing I have noticed over and over is that plants recover faster when the repotting is paired with stable light and temperature. A plant moved from a chilly 58°F (14°C) room into a steady 70°F (21°C) space usually bounces back faster than one left in a drafty corner. Small environmental changes matter more than most people expect.
Move up just 1 to 2 inches in pot size, use airy soil, and give the plant 2 to 4 weeks to settle before fertilizing or making more changes.
| Plant Type | Pot Size Change | Best Soil Style | Recovery Time |
|---|---|---|---|
| Monstera deliciosa | +1 to 2 inches | Chunky indoor mix | 2 to 4 weeks |
| Snake plant | Same size or +1 inch | Fast-draining cactus mix | 1 to 3 weeks |
| Peace lily | +1 to 2 inches | Moisture-retentive but airy mix | 2 to 3 weeks |
| Phalaenopsis orchid | Same size or slightly larger | Bark-based orchid mix | 3 to 6 weeks |
Q: How often should houseplants be repotted?
A: Most fast growers need repotting every 12 to 18 months, while slower plants like snake plants can go 2 to 3 years. The real signal is root crowding, not the calendar.
Q: Should I water right after repotting?
A: Yes, in most cases. Water once after repotting so the soil settles around the roots, then let it dry according to the plant’s needs. If you repotted a cactus or succulent, wait 3 to 5 days before watering.
Q: What if the plant looks worse after repotting?
A: Mild droop for 24 to 48 hours is common. If the plant keeps declining after 7 days, check for overwatering, poor drainage, or a pot that is too large.
Bottom line: repotting houseplants step by step works best when you keep the pot only slightly larger, use a breathable mix, and give the plant a calm 2-to-4-week recovery period—what plant in your collection is clearly ready for a bigger home?
Sources: uaex.uada.edu, mahoneysgarden.com, extension.psu.edu